To start with, you will need to have your PowerPoint presentation as well as the other file that you want to link to. In this example, we will be linking two PowerPoint presentations together and jumping immediately to Slide 2 on the second presentation.
Link Multiple PowerPoint Presentations
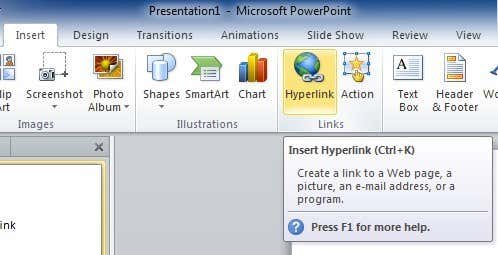
Step 1: Find or create the object that you want for your link. This could be a picture, clipart, text, etc. Select that object and click on the Hyperlink button under the Insert tab. This should work just fine on Office 2007, 2010 and 2013.
Step 2: Now the hyperlink dialog box has opened, browse for and find your file that you want to link to. Click once to highlight the file, but do not close the dialog box yet because there is one more step to complete. Note: If you finish at this step, you will simply link to the entire presentation or document, instead of to a specific location within that document.
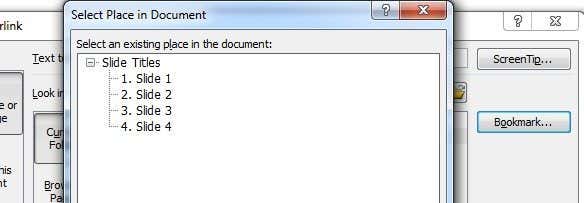
Step 3: Click on the Bookmark button located on the right hand side of the dialog box. This button will open another window where you can select the location you wish to jump to in the linked document. If you are linking to a PowerPoint presentation, it will display all of the different slides. Select the location in the presentation you want and press OK.
Step 4: Click on the appropriate buttons to close and save the changes you just made. Step 5: Test the link to make sure it works properly. Note: Hyperlinks in PowerPoint only work when you are in slideshow mode. This feature can be very useful if you want to use a portion of a different presentation in your own, but don’t want to make your presentation very long in the process. It is also useful if you want to tailor your presentation to different audiences. For some audiences, you can go through your presentation without clicking on the hyperlink, but others might need more details, so then you click on the hyperlink and show them the additional information. It’s also worth noting that when you link to another slide in a different presentation, it will show all slides after the linked slide that are in the second presentation before coming back to the next slide in the original presentation.
Link PowerPoint to Word or Excel
Unfortunately, the process for linking to a Word bookmark or Excel named range is not as straightforward. If you follow the steps above and select a Word file and then click on Bookmark, you’ll get the following error message:
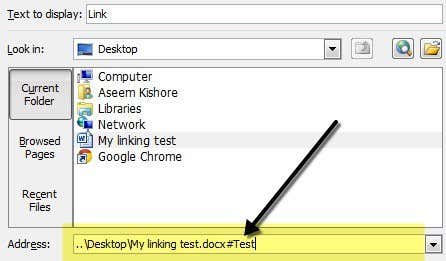
So what are you supposed to do now? Well, you have to manually type in the bookmark name or named range after the path in the address box.
First, select the file and then add a # symbol and the name of the bookmark to the end. Click OK and then test out the link to make sure it works. In case you aren’t sure how to create bookmarks in Word, all you have to do is select any location on your Word doc and then go to the Insert tab and click on Bookmark.
Go ahead and give your bookmark a name and that’s about it. When you click on the link from your PowerPoint presentation, it will open the Word at the exact location of the bookmark in the document.
In Excel, select the cells and then go ahead and type in a name in the small box that shows you the cell numbers and then press Enter.
When you click on the link, it will open Excel and the entire range will automatically be selected so you don’t have to go around trying to search for it. Overall, the hyperlink feature is pretty useful if you have a presentation that would be supplemented with links out to data or supporting documents. If you have any questions, post a comment. Enjoy!