This is possible if the device is loaded with heavy visual effects and the background process priority for the Desktop Window environment is set high. A bug in the operating system also appears to be contributing to this issue. Taking these factors into account, we will offer some solutions for fixing this problem in this article today.
What Causes Desktop Window Manager to Use High GPU
Desktop Window Manager (DWM) is a Windows application that handles the function of personalization. The themes you get to see on windows, including the animations, wallpapers, transparent windows, and other such visual elements, are handled by the DWM. DWM’s executable file dwm.exe resides in the windows\system32 directory and runs on the system processes the whole time you use your Windows device. If you see its process in the task manager, you might find its CPU and GPU utilization very high.
How to Fix Desktop Window Manager High GPU
It is possible that the GPU usage might be shown high for the DWM due to some temporary glitches in the task manager or the system. Start by restarting the computer and checking if the problem exists as earlier. Also, ensure that a few processes that use DWM are running in the background.
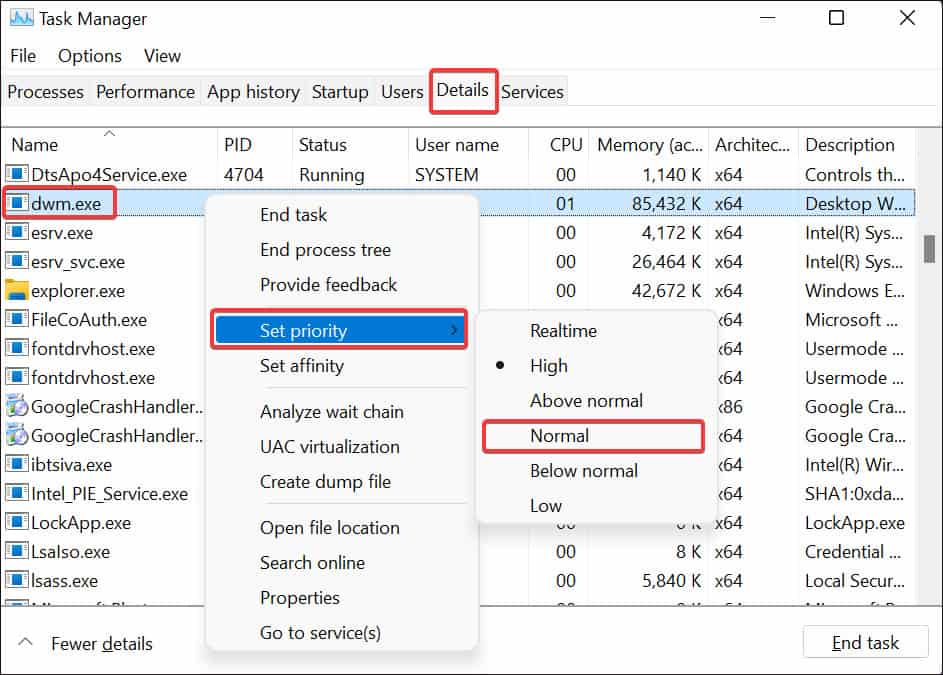
Change Priority for DWM process
You may choose to run the applications on your Windows system with varying priorities. Setting it for a high priority will consume high GPU and CPU resources. It is possible that the Desktop Window Manager is set to a high-priority mode. You can configure it to run low-key from the Task Manager to fix it.
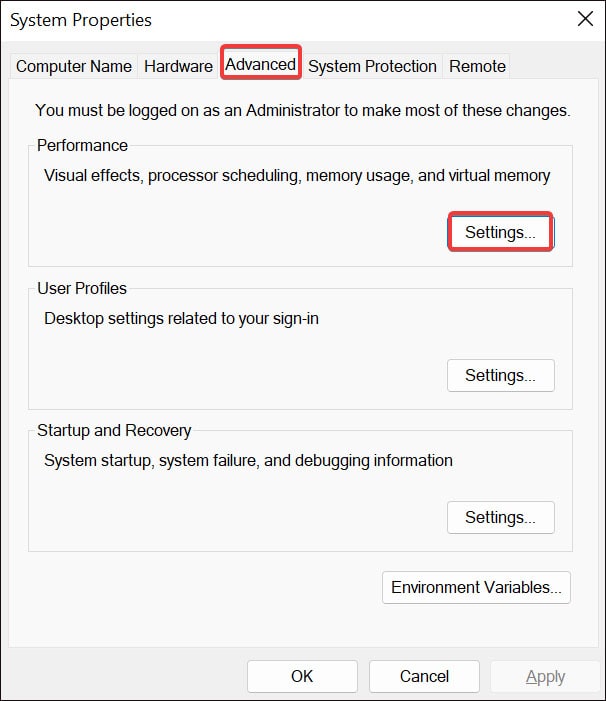
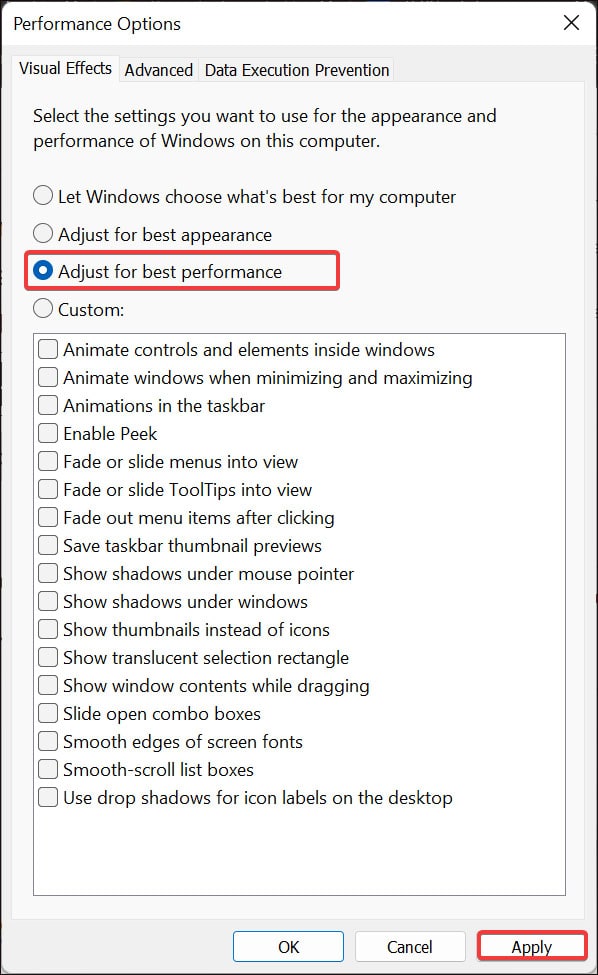
Configure the Visual Effects
It is no wonder that if your device is running with high visual effects, it will consume a greater proportion of the GPUs capacity. This might be the reason that you are seeing a high GPU utilization by dwm.exe. You can configure the visual effects and tone them down for best performance and lower GPU usage.
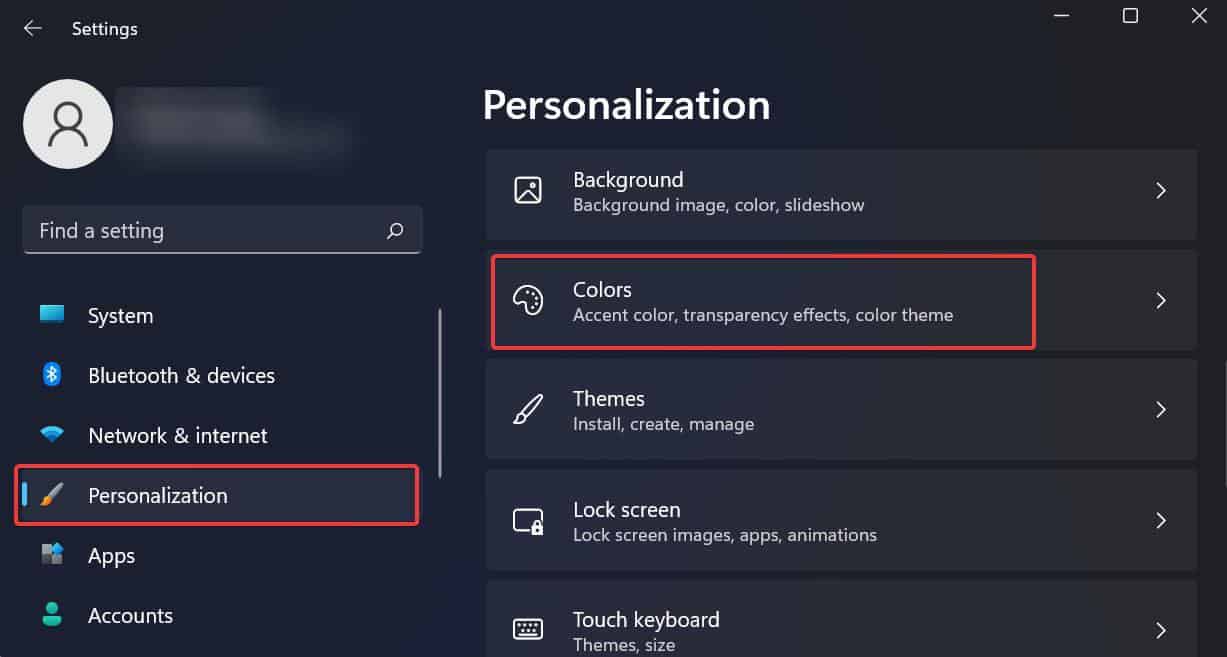
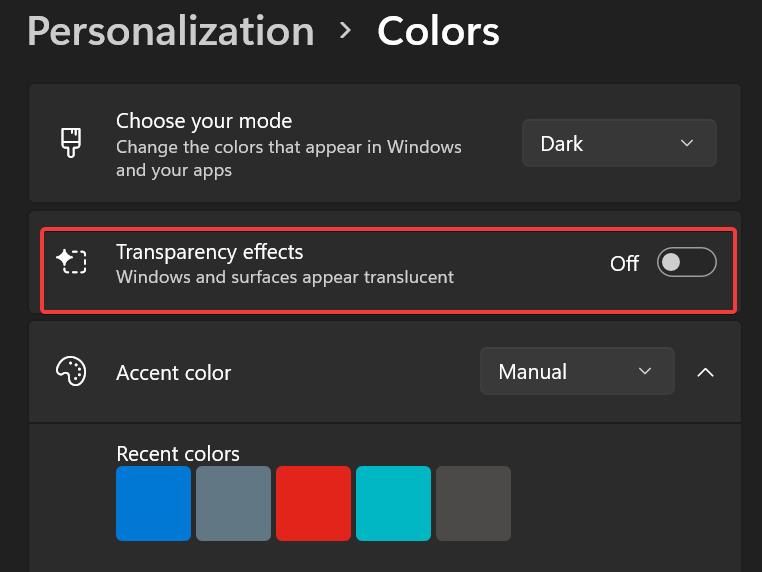
Turn off Transparency Effects
This effect makes the start menu, taskbar, and windows transparent to enhance the aesthetics of the Windows OS. However, it is also using a lot of system resources through Desktop Window Management. As reported by some users, disabling the transparency effects resolved this issue for them. Here’s how you too can disable it.
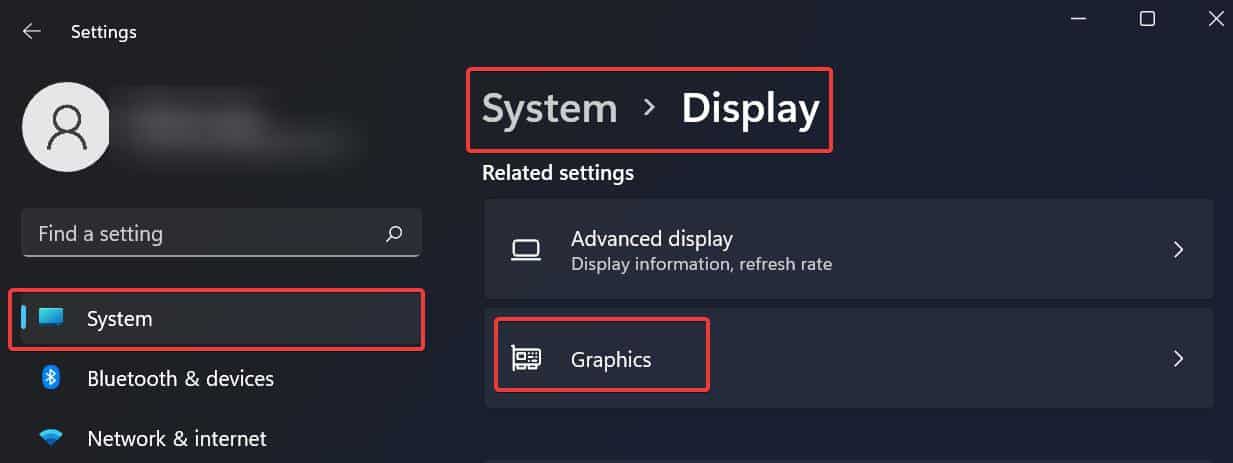
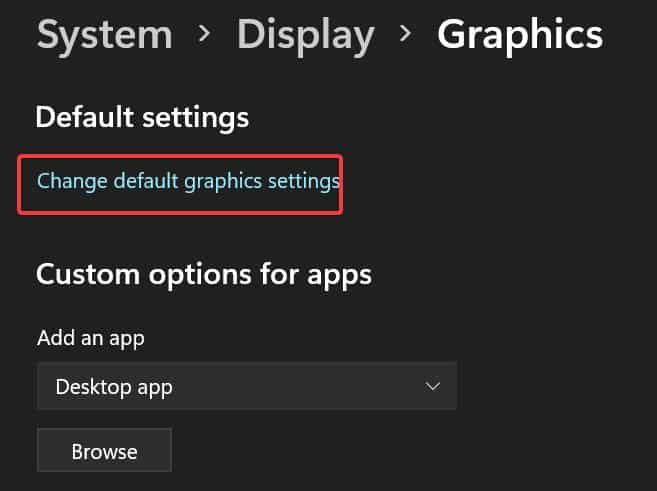
Disable Hardware Acceleration
If you have hardware acceleration enabled, the DWM might get to utilize the excess of the GPU resources. The hardware acceleration feature consumes a higher proportion of GPU and extracts much from the CPU as well. To disable it,
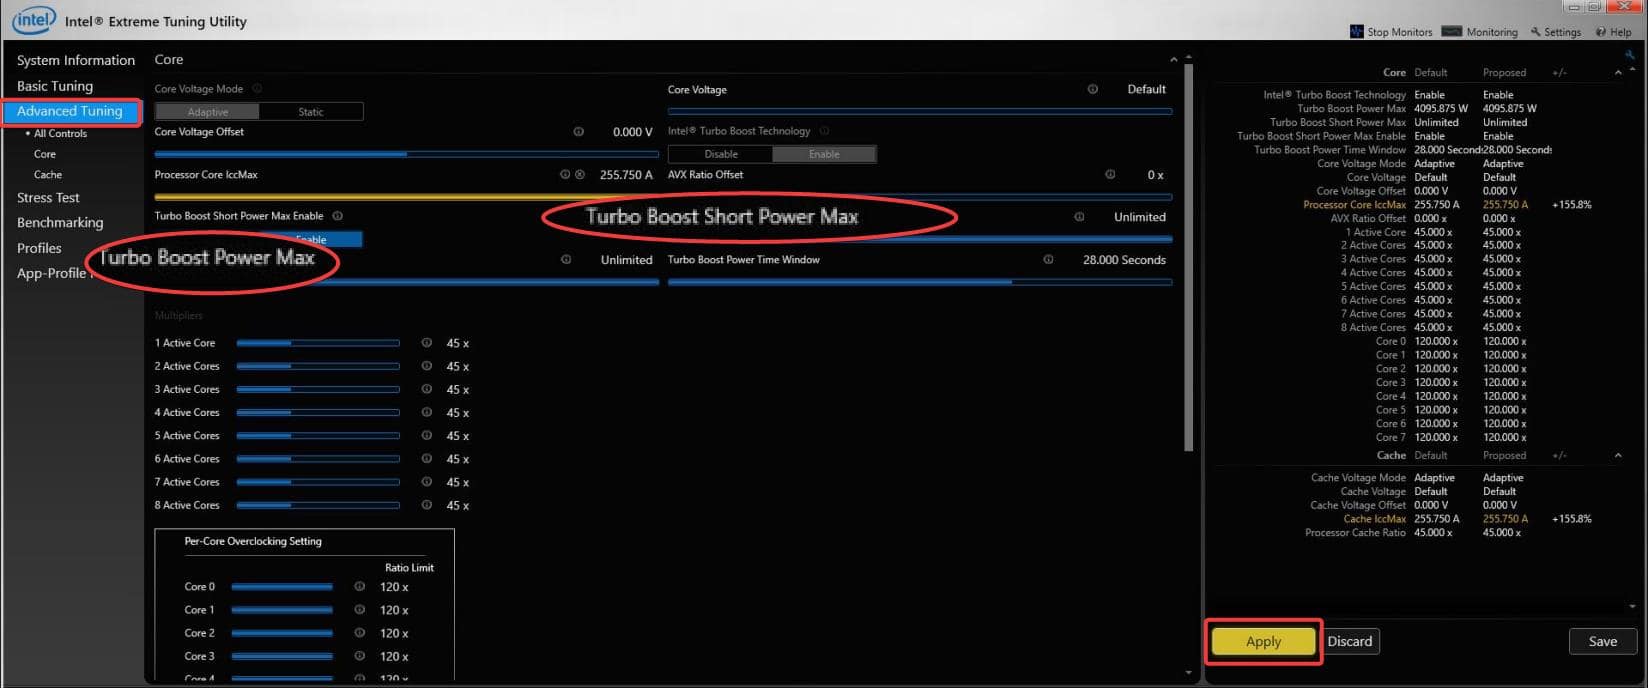
Decrease Power Limit Throttling
If the heavy visual settings are incorporated into the Windows, which is a graphically intensive task, it can add stress to the GPU and ultimately result in throttling. To resolve this, you can decrease the Power throttling using the CPU tuning application. In the case of Intel CPUs with Integrated GPUs, you can use the Intel Extreme Tuning Utility to control the Power Limit Throttling.
Update/Rollback the Graphic Drivers
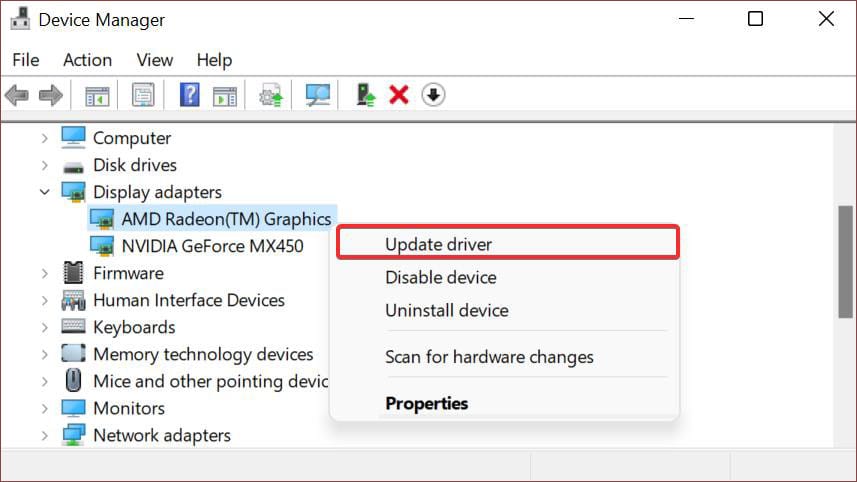
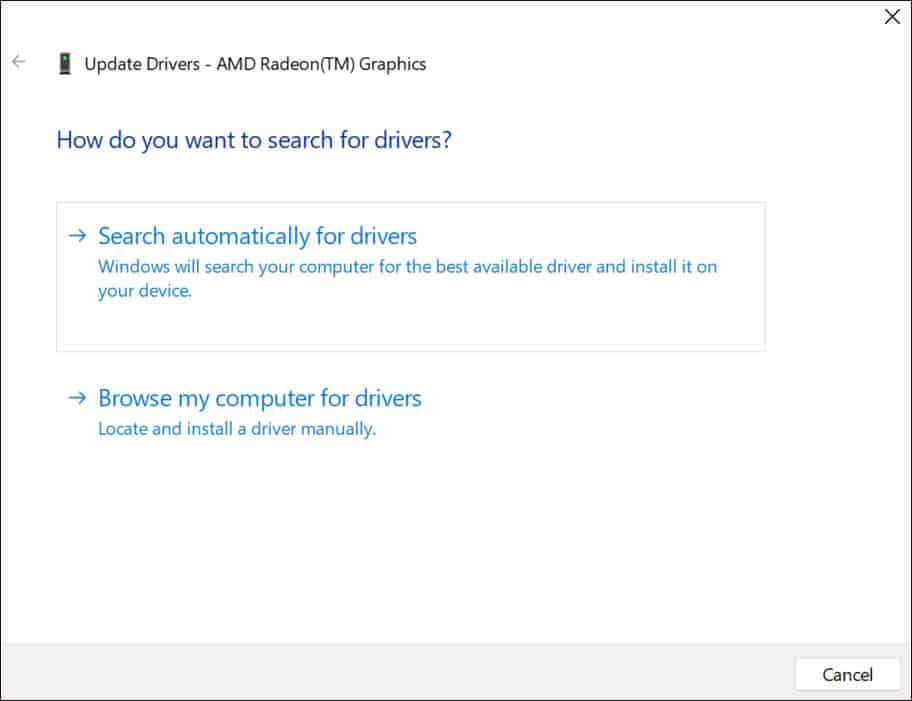
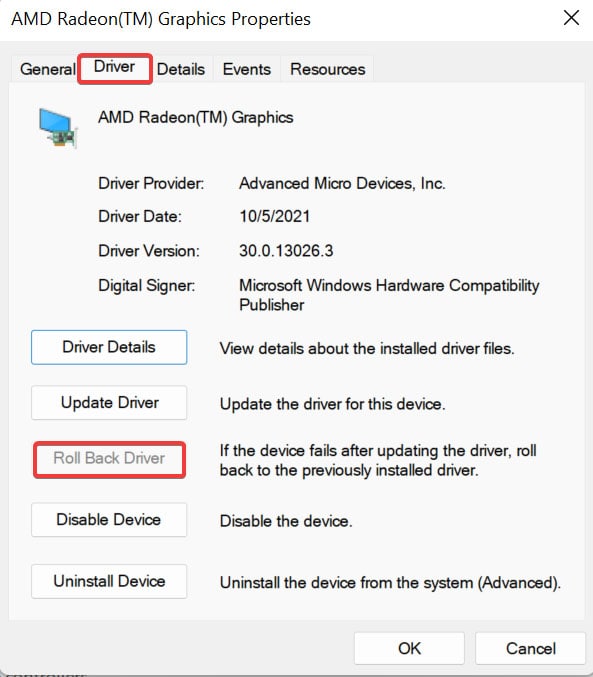
If the Graphic card drivers are outdated or have some issues with them, it can generate such problems. Updating the drivers works most of the time. You can update the drivers from the Device manager or manually install the latest ones from the GPU manufacturers. You can also manually install the updates by downloading the installers from the manufacturer’s website. You can check out this article which deals with updating the graphic drivers on Windows. If you have been experiencing this issue after updating the graphic drivers, you can even roll back to the previous stable version of the driver.
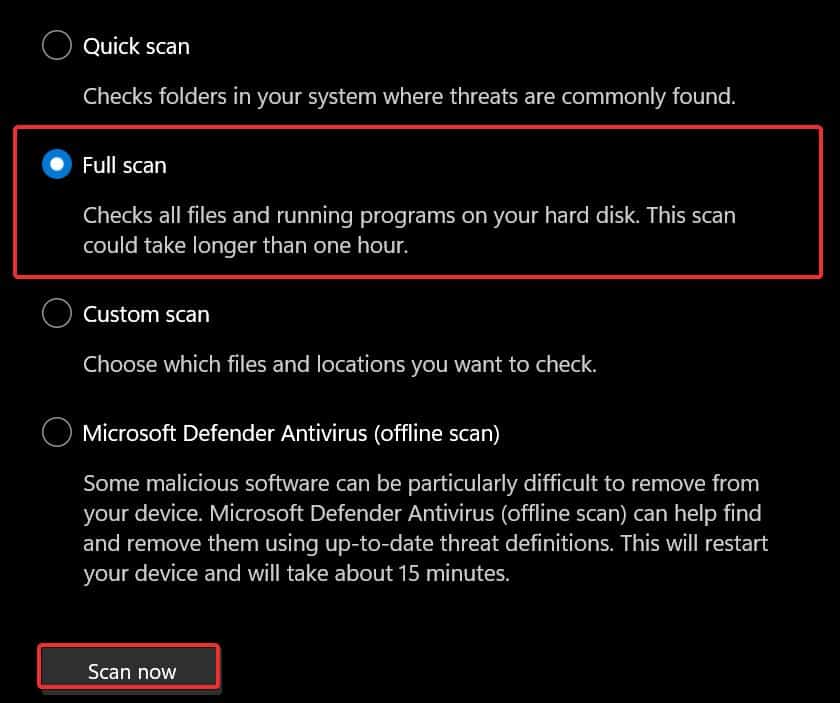
Scan for Malware
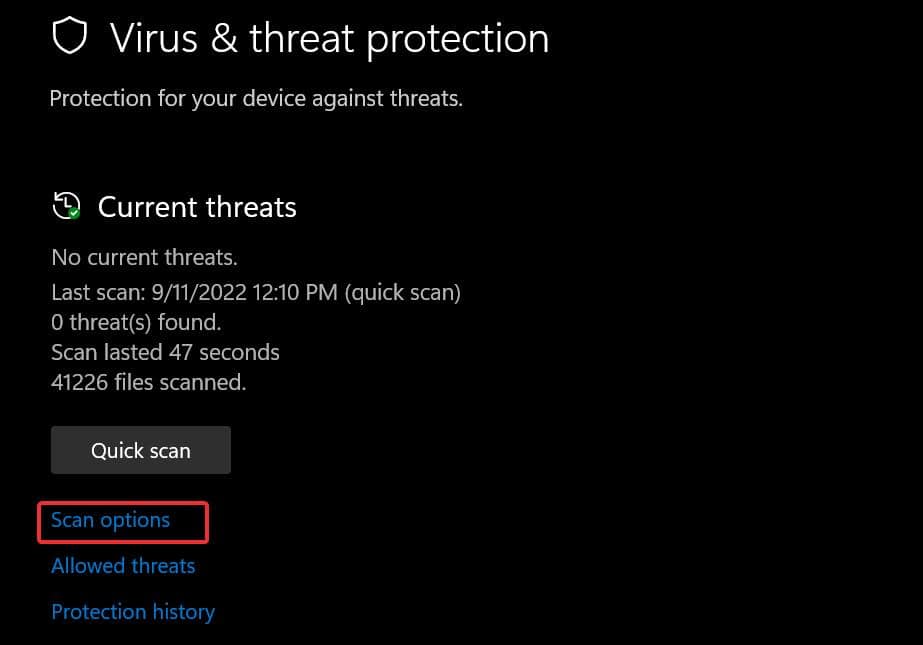
Malware is well known to hog the system resources for some unauthorized tasks without the user’s approval or knowledge. It is possible that malware has disguised its process as the Desktop Window Manager and raised the GPU utilization index. Therefore, it’s ideal for running a malware scan to remove any sort of troublemakers from the system.
Perform windows update
This issue of the DWM using a high GPU can very well be due to the issues in the operating system. It is also seen that on the latest builds of Windows 10 and 11, this problem seems to have been fixed. In order to update the Windows,
